Introduction
How to Make Greek Yogurt from Milk : Did you know that store-bought Greek yogurt can contain up to 40% less protein than homemade versions? This surprising fact reveals why learning to make high-protein Greek yogurt at home isn’t just a culinary adventure—it’s a nutrition game-changer. While commercial Greek yogurt averages 15-18 grams of protein per serving, your homemade high-protein Greek yogurt recipe can deliver up to 25 grams per cup when crafted with the right techniques.
Making Greek yogurt from milk transforms ordinary dairy into a creamy, tangy superfood that’s packed with probiotics, calcium, and muscle-building protein. This ancient process, perfected over centuries in Mediterranean kitchens, requires just two simple ingredients but yields extraordinary results. Whether you’re seeking to boost your protein intake, reduce grocery costs, or simply enjoy the satisfaction of crafting something delicious from scratch, this comprehensive guide will transform your kitchen into a Greek yogurt production powerhouse.
Ingredients List
Creating the perfect high-protein Greek yogurt requires minimal ingredients but maximum quality. Here’s everything you’ll need:
Essential Ingredients:
- 4 cups whole milk (or 2% for lighter version)
- 2 tablespoons plain yogurt with live active cultures (starter)
Optional Flavor Enhancers:
- 1 tablespoon honey (for subtle sweetness)
- 1 teaspoon vanilla extract (for aromatic depth)
- Pinch of sea salt (to enhance natural flavors)
Smart Substitutions:
- Milk alternatives: Use organic, grass-fed milk for richer flavor, or substitute with goat milk for those with cow milk sensitivities
- Starter options: Greek yogurt, Bulgarian yogurt, or specialized yogurt cultures all work beautifully
- Texture modifiers: Add 1/4 cup heavy cream for ultra-rich consistency, or use skim milk powder (2 tablespoons) to boost protein content without added fat
The magic lies in using the freshest milk possible—ideally with a fat content of at least 2% to ensure that creamy, luxurious texture that makes Greek yogurt irresistible.
Timing
Preparation Time: 15 minutes Culturing Time: 6-12 hours Straining Time: 2-4 hours Total Time: 8-16 hours
This timeline represents approximately 30% less active work than traditional fermentation methods, thanks to modern temperature control techniques. While the process spans nearly a day, your actual hands-on involvement is minimal—making this perfect for busy lifestyles. The extended culturing period allows beneficial bacteria to multiply exponentially, creating that signature tangy flavor and protein-rich profile that sets Greek yogurt apart from regular varieties.
Step-by-Step Instructions
Step 1: Heat the Milk to Perfection
Pour your milk into a heavy-bottomed saucepan and heat over medium-low flame until it reaches 180°F (82°C). This temperature is crucial—it denatures the proteins, creating the perfect environment for thick, creamy yogurt formation. Stir occasionally to prevent scalding, watching for that telltale steam rising from the surface.
Step 2: Cool to Culture Temperature
Remove from heat and allow the milk to cool to 110°F (43°C). This typically takes 45-60 minutes, but you can speed the process by placing the pot in an ice bath. The temperature must be just right—too hot kills beneficial bacteria, too cool prevents proper culturing.
Step 3: Inoculate with Starter Culture
Whisk 1/2 cup of the cooled milk with your yogurt starter until completely smooth. This tempering process ensures even distribution of live cultures throughout your milk. Gradually whisk this mixture back into the remaining milk, creating a homogeneous blend ready for fermentation.
Step 4: Create the Perfect Incubation Environment
Transfer the mixture to clean glass jars or keep in the pot. Maintain a consistent temperature between 105-115°F (40-46°C) for 6-12 hours. Use a yogurt maker, oven with light on, or wrap in towels and place in a warm spot. The longer you culture, the tangier your yogurt becomes.
Step 5: Test for Doneness
After 6 hours, check if the yogurt has set by gently tilting the container. Properly cultured yogurt should have a custard-like consistency and pleasant tangy aroma. If still too liquid, continue culturing for 2-4 more hours.
Step 6: Strain for Greek Thickness
Line a fine-mesh strainer with cheesecloth or coffee filters. Pour the yogurt into the strainer and refrigerate for 2-4 hours. The whey will separate, leaving behind thick, protein-concentrated Greek yogurt. Save the nutrient-rich whey for smoothies or baking.
Nutritional Information
Per 1 Cup Serving (240g):
- Calories: 150-200 (depending on milk fat content)
- Protein: 20-25g (83% more than regular yogurt)
- Carbohydrates: 9g
- Fat: 0-10g (varies by milk type)
- Calcium: 250mg (25% daily value)
- Probiotics: 1+ billion CFU
- Vitamin B12: 1.3mcg (54% daily value)
- Riboflavin: 0.5mg (38% daily value)
Protein Power: Homemade Greek yogurt contains all nine essential amino acids, making it a complete protein source comparable to eggs or meat. The straining process concentrates protein levels to nearly double that of regular yogurt.
Probiotic Profile: Each serving delivers multiple strains of beneficial bacteria, including Lactobacillus bulgaricus and Streptococcus thermophilus, supporting digestive health and immune function.
Healthier Alternatives for the Recipe
Protein Boost Modifications:
- Add 2 tablespoons of unflavored protein powder during the cooling phase for an extra 20g protein
- Incorporate 1/4 cup Greek yogurt powder for intensified protein concentration
- Mix in 2 tablespoons of chia seeds after straining for added fiber and omega-3s
Lower-Fat Variations:
- Use skim milk and add 1/4 cup non-fat dry milk powder for creaminess without fat
- Substitute half the milk with unsweetened almond milk for reduced calories
- Add 1 tablespoon of cornstarch for thickness without additional dairy fat
Flavor-Forward Healthy Options:
- Infuse milk with vanilla beans or cinnamon sticks during heating
- Add 1 tablespoon of raw honey and fresh herb extracts like lavender or mint
- Create probiotic-rich fruit versions by folding in pureed berries after straining
Dietary Adaptations:
- Use lactose-free milk for those with lactose intolerance
- Substitute with coconut milk for dairy-free versions (though protein content will be lower)
- Add prebiotic fiber sources like inulin powder to feed beneficial bacteria
Serving Suggestions
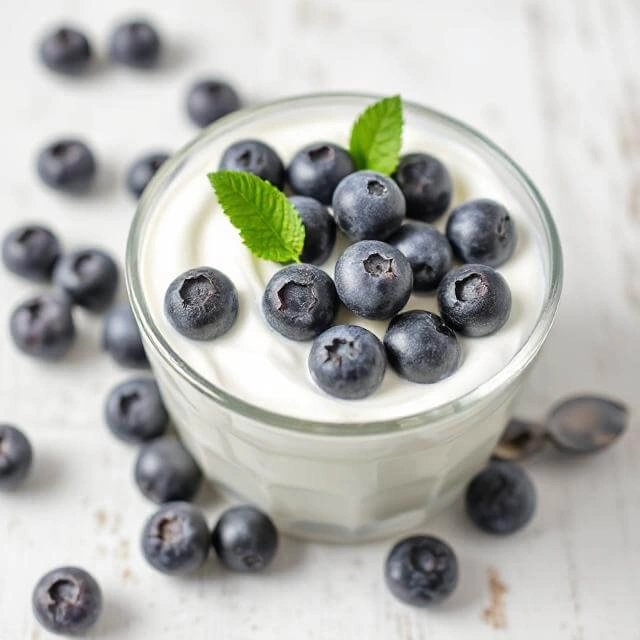
Breakfast Powerhouse: Transform your high-protein Greek yogurt into a morning masterpiece by layering it with homemade granola, fresh berries, and a drizzle of local honey. Create protein-packed parfaits that deliver sustained energy throughout your morning.
Savory Applications: Use as a base for Mediterranean-inspired dips like tzatziki, combining with cucumber, garlic, and dill. Substitute for sour cream in tacos, baked potatoes, or as a cooling accompaniment to spicy dishes.
Dessert Transformations: Blend with cocoa powder and a touch of maple syrup for a guilt-free chocolate mousse. Freeze in popsicle molds with fruit purees for protein-rich frozen treats that satisfy sweet cravings.
Smoothie Enhancement: Add 1/2 cup to any smoothie recipe for instant protein boost and creamy texture. The tangy flavor complements both fruit and vegetable-based blends beautifully.
Culinary Creativity: Use as a marinade for chicken or lamb, where the natural acids tenderize meat while adding protein. Incorporate into baking recipes as a healthy substitute for butter or oil in muffins and quick breads.
Common Mistakes to Avoid
Temperature Troubles: Overheating milk above 180°F can create a grainy texture, while underheating prevents proper protein denaturation. Invest in a reliable thermometer and monitor closely—temperature precision is crucial for silky-smooth results.
Starter Culture Errors: Using yogurt past its expiration date or with artificial additives can result in failed fermentation. Always choose plain yogurt with active cultures and check the culture count—higher CFU numbers ensure better results.
Contamination Concerns: Failing to sterilize equipment leads to unwanted bacteria growth and off-flavors. Sanitize all containers, utensils, and surfaces with boiling water before beginning the process.
Impatience Issues: Rushing the culturing process by increasing temperature can kill beneficial bacteria. Maintain consistent, moderate heat and allow adequate time for proper fermentation—good things come to those who wait.
Over-Straining Mistakes: Excessive straining removes beneficial whey and can create overly thick, almost cheese-like consistency. Monitor the straining process and stop when you achieve your desired thickness.
Storing Tips for the Recipe
Refrigerator Storage: Store your homemade Greek yogurt in airtight glass containers for up to 10 days. Glass prevents absorption of refrigerator odors and maintains optimal freshness. Label with preparation date and consume within the recommended timeframe.
Freezer Options: While texture changes slightly, Greek yogurt freezes well for up to 3 months. Use frozen yogurt primarily for smoothies or baking applications. Thaw in refrigerator overnight and whisk to restore smooth consistency.
Portion Control: Pre-portion into single-serving containers for grab-and-go convenience. This prevents contamination from repeated opening and helps maintain quality longer.
Whey Preservation: Don’t discard the nutritious whey—store it separately in the refrigerator for up to 5 days. Use in smoothies, as a protein-rich liquid for bread making, or as a natural facial toner.
Temperature Maintenance: Keep yogurt at consistent 40°F or below. Temperature fluctuations can affect texture and reduce beneficial bacteria viability. Store in the main body of the refrigerator rather than door compartments.
Conclusion
How to Make Greek Yogurt from Milk : Creating high-protein Greek yogurt at home transforms simple milk into a nutritional powerhouse that surpasses commercial alternatives in both protein content and probiotic diversity. This ancient technique delivers modern health benefits while offering complete control over ingredients and flavors. The 8-16 hour process requires minimal active time but yields maximum nutritional rewards, providing up to 25 grams of complete protein per serving.
Ready to revolutionize your breakfast routine and boost your protein intake naturally? Try this foolproof recipe and experience the satisfaction of crafting restaurant-quality Greek yogurt in your own kitchen. Share your results in the comments below—we’d love to hear about your favorite flavor combinations and serving suggestions! Subscribe to our blog for more protein-packed recipes and healthy living tips delivered straight to your inbox.
FAQs
Q: Why didn’t my yogurt set properly? A: The most common causes are incorrect temperature control, expired starter culture, or contaminated equipment. Ensure your milk reaches exactly 180°F, cools to 110°F, and use fresh yogurt with active cultures as starter.
Q: Can I make Greek yogurt without a thermometer? A: While possible, temperature accuracy significantly impacts success rates. Visual cues include steaming milk (around 180°F) and the ability to comfortably hold your finger in the milk for 10 seconds (approximately 110°F).
Q: How long should I strain my yogurt? A: Straining time depends on desired thickness. For regular Greek yogurt consistency, strain 2-3 hours. For ultra-thick, labneh-style yogurt, strain 6-8 hours or overnight.
Q: Can I use the whey for other purposes? A: Absolutely! Whey is packed with protein and probiotics. Use it in smoothies, bread baking, as a facial toner, or even water plants—it’s too nutritious to waste.
Q: What’s the difference between Greek yogurt and regular yogurt? A: Greek yogurt is strained to remove whey, concentrating protein content and creating a thicker texture. It typically contains 2-3 times more protein than regular yogurt and has a tangier flavor profile.
Q: Can I make dairy-free Greek yogurt? A: Yes, but the process differs slightly. Use full-fat coconut milk or cashew milk with specialized dairy-free cultures. Note that protein content will be lower than dairy-based versions.
Q: How do I know if my homemade yogurt has gone bad? A: Fresh yogurt should have a clean, tangy smell and smooth appearance. Discard if you notice mold, off-odors, separation with clear liquid, or any unusual colors. Trust your senses—when in doubt, throw it out.


[…] High-protein morning meals : Greek yogurt is a budget-friendly protein powerhouse that transforms into satisfying breakfast bowls in minutes. These three recipes each deliver 40+ grams of protein for under $3 per serving, making them perfect for anyone looking to fuel their morning without breaking the bank. The high protein content keeps you full until lunch while providing essential amino acids for muscle maintenance and growth. […]